Block under the lower back or the sacrum? Six jobs for restorative yoga props
When I was learning to meditate, I installed an app that went “ding” every five minutes.
Every ding, I had to stop and check where I was clenching. Face, shoulders, glutes. Every time, I caught one.
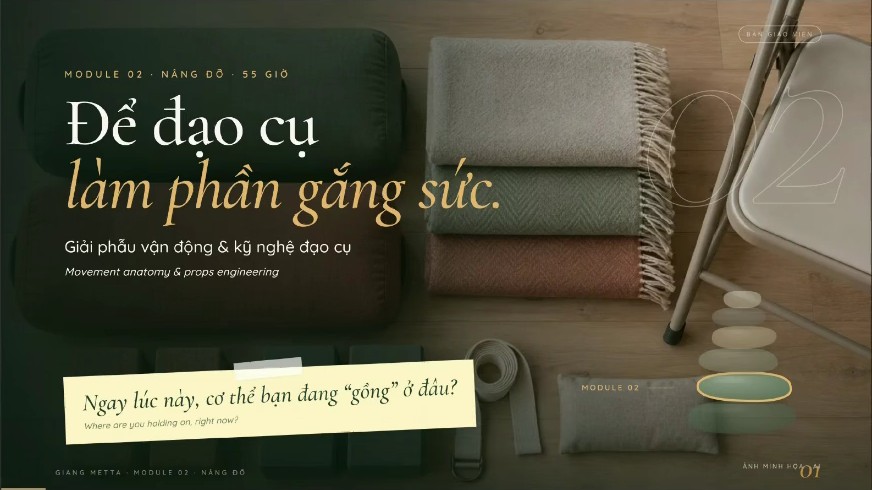
I told this story at the start of Module 2 in the 300H online class. The module is called “Support.” The whole class turned on one question: where is the body working to hold itself up, and what prop can carry that for it?
Try one question first
A student lies in bridge pose but can’t keep the hips up for long. You have one block.
Quick answer
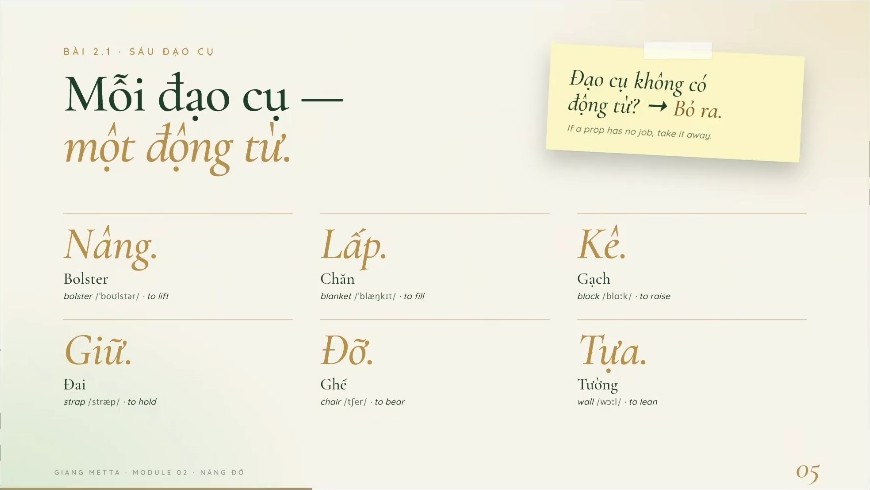
Restorative yoga uses six main props: bolster, blanket, block, strap, chair, wall. Each has one job: lift, fill, raise, hold, support, lean.
Choose props by starting with a question: without props, where is there a gap, and where does the body have to work to hold itself?
Supported bridge: the block goes under the sacrum, not the lower back. To come out, lift the hips first, then take the block away.
16’Six props, six verbs
I don’t make students memorise the names of props. I make them memorise what each prop does.
- LiftBolsterBrings a whole area up: under the knees, or sloped behind the back.
- FillBlanketFills the gap between the body and the floor, like behind the back or under the neck.
- RaiseBlockGoes under one point to make it higher: under the bolster, under the knees, under the back or chest, depending on the pose.
- HoldStrapTies the thighs or legs so they don’t slide out to the side.
- SupportChairSore knees, can’t sit on the mat? Practise on a chair, and rest the arms or legs on it.
- LeanWallNot steady standing? Lean on the wall. Can’t stand on one leg yet? Put the foot on the wall.
“Tell me the difference between the words for ‘raise’ and ‘lift.’ I’ll ask you in a minute.”
“Looks like we’re all relearning Vietnamese now.”
Name the job. Then you find the place.
Sounds like a word game. It isn’t. If you can say the verb, you know what you are asking the prop to do. If you can’t, you are often placing it out of habit.
No yoga blanket? Use a blanket from home, a thin one folded. A long scarf works too. For the chair, a dining chair on the tall side is fine.
20’Read the gaps first, choose props later
Many people can do child’s pose. Some can’t. I showed the class three gaps in one picture.
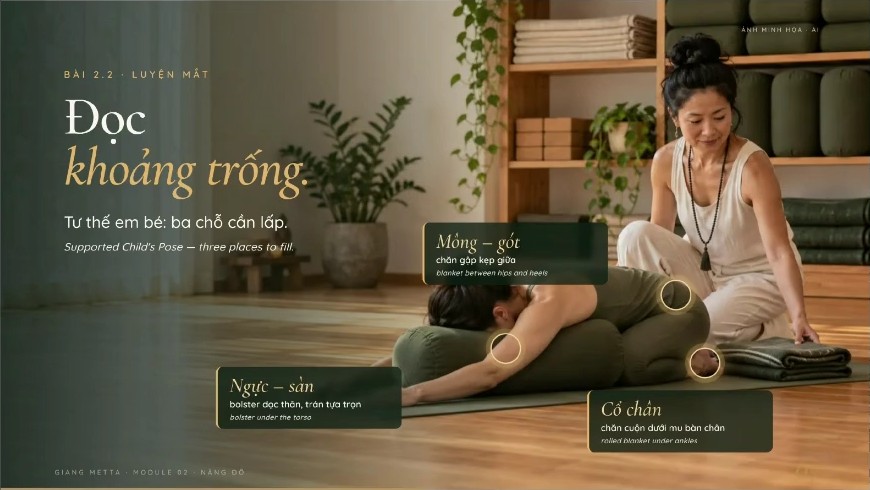
- Chest to floor. Folding forward, the back feels tight and the body won’t go any lower. A bolster lengthwise under the torso lifts it up.
- Hips to heels. The hips don’t reach the heels. They hover, and the body has to work to stay there. A folded blanket between them lets the weight settle.
- Ankles. The tops of the feet can’t lie flat, so the ankles lift and leave a gap. A rolled blanket goes right there.
“The blanket goes under the ankles. Why?”
“The ankles are stiff.”
“Stiff how? Explain properly.”
“The blanket is soft, so when the ankles press on it, it feels better.”
“Stiff in what way, exactly, that pressing on something feels better?”
“Stiff” is not enough.
I wasn’t trying to trip her up. She had felt it before. She just didn’t have the words yet.
But a teacher needs the words: where the gap is, why it is there, what goes in it. One day your students will say “stiff” too. You need the next question.
28’Bridge: why does the block go under the sacrum?
Supported bridge is for people who are tired and can’t lift their hips on their own. The block goes under the buttocks, right at the sacrum. I asked the class: why not the lower back?
“…for the lower back, if someone’s back arches, we should fill it with a blanket. I think.”
“Not quite. We’re talking about the block, and suddenly there’s a blanket.”
The answer sounded reasonable. It just went off topic. I asked about the block.
The next answer was different:
“I think it goes under the sacrum, because the lower back already arches up, and a block there would arch it even more.”
“Exactly.”
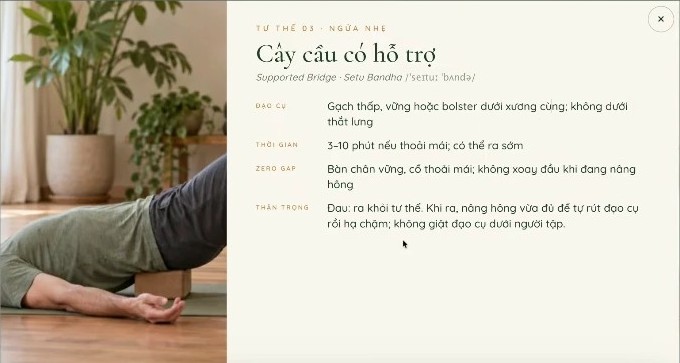
Bridge lifts the hips. If someone can’t lift them alone, the block goes right under the hips to hold them up.
Put it under the lower back and the back arches more, the belly rises, the buttocks drop. What gets lifted is the belly, not the hips.
Coming out has a method too: lift the hips, then slide the block out. Don’t yank it.
“Right now, all of this is guessing. Maybe you’re lucky and hit it, maybe you’re unlucky and miss.”
Right but untried is still a guess.
I asked everyone to get a block, try both places and tell me. Some were still looking for a block. Some asked me to wait a second.
So that day, the right answer was still only “I think.” My note for next class: props ready beside you before we start.
This article is for people learning and teaching yoga, not a home-practice guide. If your back hurts now, see a health professional first.
36’Practise your sequence before you teach it
“Only when you practise it do you see it doesn’t work. When you were writing it, it felt very smooth.”
“Teach what you know, what you have done.”
Practise first. Then teach.
The block led us to lesson plans. On paper, every sequence looks fine.
Practising it yourself isn’t the last step either. You have taught for years, so it feels light to you. A beginner in the same spot may find it much heavier. You still have to watch real people practise it.
Near the end of class, talking about hard poses, I owned up:
A teacher doesn’t need to do every pose.
You do need to really practise what you teach. And to know how to support someone who can’t do it yet.
Read what is said in the clip
- Giang: Honestly, it takes a long time to get many hard poses. I’ve taught for ten years. I have only two or three really advanced poses. Not many. Not many. Two or three. That’s as far as I got. Ask me to train more and I’m out of breath. No time left to study. And I need my sleep too.
38’Fix one spot, lose another
In a lying twist, stiff bodies often get the same problem. Press the leg to the floor and the other shoulder lifts. Press the shoulder down and the knee floats.
“If you press your leg all the way to the floor, doesn’t your right shoulder lift right up?”
“It lifts.”
Remember the pose without props.
So before we talked about bolsters or blankets, I made the class recall the pose without props: where is the gap, what lifts.
A bolster lifts the leg. A blanket fills the gap under the shoulder and head. The leg has support, and the shoulder can let go too.
With the legs up on a chair, there was a question I liked:
“Is the blanket there to make it softer, and to make it level?”
“Partly. Sometimes it’s too low and the knee wobbles. Or it makes it softer, because the edge of the chair can be hard.”
She didn’t ask where the blanket goes. She asked what job it was doing. That is the right direction.
And why a chair? Legs up the wall, the legs still hold themselves, and when they tire, they slide. Legs on a chair, you can even fall asleep.
80’The right answer was quiet, and I missed it
This one is my mistake.
Watching the recording of the class before, I saw one student answer correctly several times. She spoke softly. I was sharing my screen, and the student windows were tiny. So I skipped right past.
“Sometimes you say it right and it slips past. The teacher didn’t notice, didn’t say anything, and you think you were wrong.”
“Everyone has to speak.”
Slow down. Wait for each person.
This class I taught slower. Ask, then wait. Forgot to unmute? Unmute and say it again.
When you learn props, hearing each person’s real experience matters more than hearing one right answer.
Questions about restorative yoga props
What props do you need for restorative yoga?
Six main ones: bolster, blanket, block, strap, chair and wall. Each has a job: lift, fill, raise, hold, support, lean.
No yoga blanket. What can I use?
A blanket from home, folded; thin ones are easiest. A long scarf works too. For the chair work, a dining chair is enough.
Where does the block go in supported bridge?
Under the sacrum, not the lower back. A block under the lower back arches the back more and the hips drop. To come out, lift the hips, then take the block away.
When do you need to add a prop?
When, without props, there is a gap, a wobble, or a place the body has to work to hold itself. Look at that place first, then ask: does it need lifting, filling, raising, holding, support or a wall? A prop with no job goes away.
Does using props mean you are bad at yoga?
No. Props do the effort, so the body doesn’t have to hold itself. In restorative yoga, that is exactly their job.
Support the right place, then let go
The class began with a ding every five minutes. It ended with the same question, now asked about someone else’s body: where is it holding?
In the 300-hour online yoga teacher training, you learn to look and support like this, one restorative pose at a time, and you try it for real before you teach it.
And you, right now: where are you holding?
Sources and limits
The ideas come from one online class, Module 2 (“Support”), of the 300-hour online yoga teacher training, on 15 October 2026. The class was in Vietnamese. It was machine-transcribed and checked several times; no one has listened back to the whole class yet. Quotes are shortened, filler words are removed, and students are not named. The four images are lecture slides captured from the class screen; the people on the slides are illustrations, not students. This article does not claim the whole class tried both block positions. It is not medical advice or a guide for practising while in pain.

Giang Hoang
Yoga teacher, E-RYT 500 & YACEP (Yoga Alliance)
Giang Metta Academy: RYS 200 & RYS 500 (YA ID 442630)
Based in Da Lat, Vietnam. Teaching online worldwide.